让 agent 自己验收:pstack 的验证技能怎么搭
poteto 把「验证技能」当团队基础设施来维护:agent 能启动应用、截图、读 trace、确认改动真的生效,人才不用当瓶颈。文章给出 /create-verification-skill 的完整路径——先用一个 agent 友好的 CLI(doctor、snapshot、screenshot、wait-settle、feature-flag 等子命令)把启停、点击、性能采样封装成可复现命令,再用 Feature Map 这份 markdown 索引记录每个功能做什么、用户视角怎么进入、有哪些坑。她反对用 git worktree 横向扩容(单机大约 10 个 agent 就到顶),建议改用 Cursor cloud agents,配合 /swarm 批量跑验证;接上定时 routine 后,Slack 里的用户报告可自动复现。文中反复强调 CLI 设计规范(破坏性操作带 --dry-run、错误信息要告诉 agent 下一步、输出 JSON)和每天跑一次维护技能的必要性。适合正在搭 agent harness 的一线工程师;但「2,000 PR/月」「100-1000x」这类数字没有给测量口径,读者需自行打折。

In this series of posts, I'm going to show you how I use pstack, my personal set of skills for doing rigorous engineering work. It's allowed me to ship 2,000 PRs a month to production with high confidence.
在这个系列里,我会展示自己如何使用 pstack——一套我用来做严谨工程工作的个人技能集。靠着它,我每月能把 2,000 个 PR 送进生产环境,而且心里很有底。
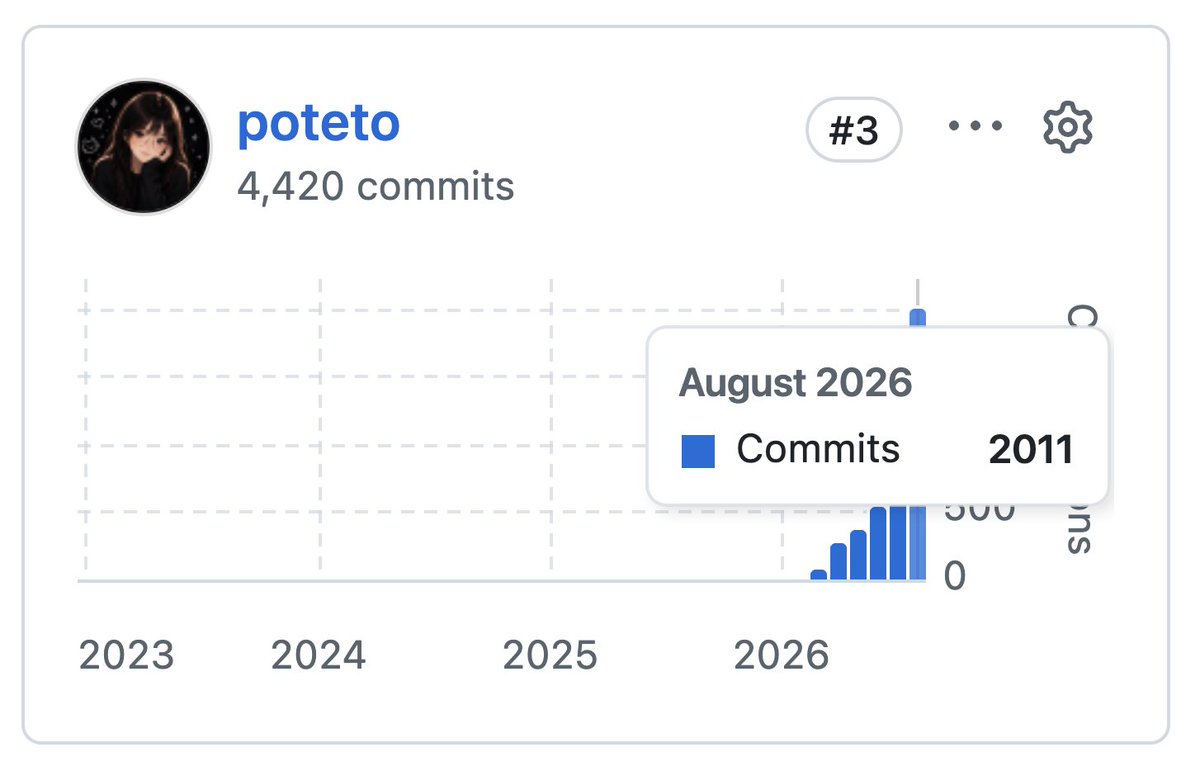
Personally, I have never put much emphasis into how many lines of code or how many PRs I was landing. Before agents, no one cared, and rightfully so, as raw productivity did not always equate to quality or a visible outcome for users. It was simply a vanity metric.
But I've discovered through the course of building pstack that volume does matter, especially when you are able to maintain or even increase the level of quality of the product with agents. For example, I started working on Grok @Bot about 2 months ago, when it was still in its early days and the codebase was fresh but starting to grow. Despite the team growing and now landing hundreds of PRs a day into the Grok @Bot codebase, pstack has allowed me to keep the quality of the code high for everyone as I constantly monitor code, refactor, add new lints and checks, and also work on features.
就个人而言,我从来没太在意自己写了多少行代码、合并了多少 PR。在 agent 出现之前,也没人在乎,这很合理,因为单纯的产出速度并不总等于质量,也不总能变成用户看得见的结果。那只是一个虚荣指标。
但在搭建 pstack 的过程中,我发现数量确实重要,尤其是当你用 agent 还能维持甚至提升产品质量的时候。举个例子,我大约两个月前开始做 Grok @Bot,那时它还很早期,代码库很新,但已经开始膨胀。团队在扩张,现在每天有数百个 PR 合进 Grok @Bot 的代码库,而 pstack 让我能持续盯代码、做重构、加新的 lint 和检查,同时还能做功能,从而把整个代码库的质量维持在高位。
Being Grok @Bot's gardener and maintainer is something I was only able to do through pstack. Our early momentum after building the prototype was very high and many people were joining the team. I had a critical moment of opportunity to refactor the whole codebase, while it was being built and extended and with no downtime, into something with strong foundations. A codebase with high quality that scales no matter how many engineers (and most importantly, non-engineers) contribute to it. All of this work requires me to refactor and improve the foundations of Grok Bot as it's being built, and you can only do that when the foundations can keep up with the number of contributions.
我能同时当 Grok @Bot 的园丁和维护者,全靠 pstack。原型做出来后,我们的势头很猛,很多人加入团队。那是一个关键窗口:代码库一边被构建和扩展,我一边把它重构成有坚实根基的东西,而且不停机。这样的代码库质量高,能随着贡献者数量增长而扩展——不管来多少工程师,更重要的是,不管来多少非工程师。所有这些工作都要求我在 Grok Bot 被构建的同时重构并改进它的地基,而只有当地基能跟得上贡献数量时,你才做得到。

The proof is in Grok @Bot itself. Over the next few weeks, I'll tell you everything you need to know to be able to build and maintain a high quality app using pstack.
Part 1 – Verification is all you need
The most critical skill to have in your toolbox is a high quality verification skill. This skill is so important to have and maintain that I think of it more like critical infrastructure rather than "just" a skill. A good one will amplify the output of your whole team, including non-engineers. Done well, you will 100-1000x your whole team's output.
If you're not familiar with the term, verification means that an agent can verify its own work. It can keep going until it succeeds at its task, because it can now close the loop without you being the bottleneck. If you're interested to know more of the story of how I created my first verification skill for Cursor, check out my previous post Loops You Can Trust.
证据就在 Grok @Bot 本身。接下来几周,我会把用 pstack 构建和维护高质量应用所需的一切都讲给你听。
第一部分——验证就是你需要的一切
你工具箱里最关键的技能,是一个高质量的验证技能。它重要到我不把它当成“一项技能”,而更愿意把它看作关键基础设施。一个好的验证技能会放大整个团队的产出,包括非工程师。做得好,你能把整个团队的产出放大 100 到 1000 倍。
如果你不熟悉这个词:验证指的是 agent 能检验自己的工作。它可以一直做下去,直到任务成功,因为它现在能自己闭环,不再让你成为瓶颈。如果你想知道我当初为 Cursor 做第一个验证技能的故事,可以去看我之前的文章《Loops You Can Trust》。
Let's build a verification skill together
To start, install pstack and then run /create-verification-skill. I also recommend adding Dr Eggbot, my bot that helps you create high quality bots, to your roster. Dr Eggbot ships with pstack. It’ll teach coding bots how to use it, and it can also make non-coding bots with the same rigor.
You can ask Dr Eggbot to create an engineer bot for you that you can then ask to run /create-verification-skill and set up a daily routine to run /maintain-verification-skill.
一起做一个验证技能
先安装 pstack,然后运行 /create-verification-skill。我还建议把 Dr Eggbot 加进你的机器人列表——它是我做的、帮你创建高质量 bot 的 bot。Dr Eggbot 随 pstack 一起发布,会教写代码的 bot 如何使用 pstack,也能用同样严格的标准做出不写代码的 bot。
你可以让 Dr Eggbot 给你创建一个工程师 bot,再让这个工程师 bot 运行 /create-verification-skill,并设置每天运行 /maintain-verification-skill 的例行任务。

While that runs, let's walk through what the skill does and how it makes a high quality verification skill for you.
I distilled all of our verification skills that we use to build Grok @Bot and Cursor into this skill as a sort of meta-skill. It teaches your agent how to create a high quality one for your own app.
趁它运行的时候,我们来看看这个技能到底做什么,以及它如何为你生成一个高质量的验证技能。
我把我们构建 Grok @Bot 和 Cursor 时用到的所有验证技能,蒸馏进了这个技能里,算是一种元技能。它会教你的 agent 为你的应用创建一个高质量的验证技能。
Now this is where choice of tech stack is important. If you're building an app in Electron or for the web for example, you can take advantage of the rich debugging tools available for the JS ecosystem. For example, the Chrome DevTools Protocol (CDP) allows you to use the same tooling available in your browser's developer tools. Or if you're building an iOS app, making use of the simulator.
You ideally want the ability to interact with your app, debug it, take perf traces, and any other debugging and development tooling that you might typically use if you were developing the app by hand. If you don't have a rich runtime to make use of, you may need to ask your agent to create tools for you (eg using lldb, or a custom package that runs as a sidecar in dev environments), or just make use of what you have available.
I personally feel that agentic verification is so important that I would unironically suggest building your own rich debugging tools, or even choosing a different tech stack, in order to have unfair advantages and extreme productivity in building software. As I mentioned earlier, giving agents the ability to verify their own work unlocks everyone in your organization to be able to contribute and validate that their changes actually work. The harder your tech stack is to debug and control, the more difficult it will be to use agents productively.
这里就能看出技术栈选择的重要性。比如你用 Electron 或做 Web 应用,就能利用 JS 生态里丰富的调试工具。Chrome DevTools Protocol(CDP)让你能用上浏览器开发者工具里的同一套能力。如果你做 iOS 应用,就可以利用模拟器。
理想情况下,你希望能与自己的应用交互、调试它、抓性能 trace,以及使用你手写代码时常用的一切调试和开发工具。如果你没有一个能力丰富的运行时可用,可能就得让 agent 为你造工具(比如用 lldb,或做一个在开发环境里以 sidecar 方式运行的自定义包),或者至少把手头能用的东西用起来。
我个人认为 agent 验证重要到——说真的——我会建议你自己打造丰富的调试工具,甚至换一个技术栈,好在构建软件时获得不公平的优势和极高的生产力。就像前面说的,让 agent 能验证自己的工作,会解锁组织里每个人参与贡献并确认自己的改动真的有效。技术栈越难调试、越难控制,就越难高效地用 agent。
Make it Reproducible
In pstack, we have a principle called "Build the Lever". What this means in the context of creating a skill, is that we prefer to give agents tools rather than just markdown. For verification skills, this means creating a small CLI that scripts interaction and debugging of your app in a small, agent friendly utility. This means that agents consume fewer tokens trying to do a task (run a CLI command instead of writing a throwaway script to click on something), and makes your verification skill more reproducible and testable.
Here's a hypothetical example of a CLI your agent might make for an Electron app:
# health
node .cursor/skills/verify-atlas/control-atlas.mjs doctor

# open a blank thread and send
node .cursor/skills/verify-atlas/control-atlas.mjs new-session
node .cursor/skills/verify-atlas/control-atlas.mjs send "list open tasks in this project"

# keyboard path
node .cursor/skills/verify-atlas/control-atlas.mjs press "Meta+KeyN"

# accessibility snapshot of the live UI
node .cursor/skills/verify-atlas/control-atlas.mjs snapshot

# screenshot for evidence
node .cursor/skills/verify-atlas/control-atlas.mjs screenshot /tmp/atlas-proof.png

# wait for streaming / layout to settle
node .cursor/skills/verify-atlas/control-atlas.mjs wait-settle

# flip a feature flag for the session
node .cursor/skills/verify-atlas/control-atlas.mjs feature-flag rooms_v2 on
让它可复现
pstack 里有一条原则叫“Build the Lever”(造杠杆)。放到创建技能这件事上,意思是:我们更愿意给 agent 工具,而不只是给它 markdown。对验证技能来说,就是做一个小型 CLI,把应用的交互和调试脚本化,变成一个体量小、对 agent 友好的工具。这样 agent 执行任务时消耗的 token 更少(运行一条 CLI 命令,而不是写一个一次性脚本来点某个东西),你的验证技能也更容易复现和测试。
下面是一个假设的例子:你的 agent 可能为 Electron 应用做一个这样的 CLI:
# health
node .cursor/skills/verify-atlas/control-atlas.mjs doctor

# open a blank thread and send
node .cursor/skills/verify-atlas/control-atlas.mjs new-session
node .cursor/skills/verify-atlas/control-atlas.mjs send "list open tasks in this project"

# keyboard path
node .cursor/skills/verify-atlas/control-atlas.mjs press "Meta+KeyN"

# accessibility snapshot of the live UI
node .cursor/skills/verify-atlas/control-atlas.mjs snapshot

# screenshot for evidence
node .cursor/skills/verify-atlas/control-atlas.mjs screenshot /tmp/atlas-proof.png

# wait for streaming / layout to settle
node .cursor/skills/verify-atlas/control-atlas.mjs wait-settle

# flip a feature flag for the session
node .cursor/skills/verify-atlas/control-atlas.mjs feature-flag rooms_v2 on
Now, all agents can use this CLI to quickly navigate and debug your app. You'll also want to start thinking about the dev experience of building your app:
- seeding a dev database
- how to handle auth, test users, API calls against a test/staging environment
- installing and bringing up your dev environment in a consistent way All of this is stuff you've probably needed to think about anyway when you were writing code yourself. So think of this as your agents' main utility for doing dev work on your app. Keep it well maintained and tested!
Some other example commands you might want to consider:
- **Inspection:** `info`, `snapshot`, `screenshot`, `components`
- **Navigation:** `home`, `new-session`, `select-project`, `select-runtime`, `scroll`
- **Interaction:** `send`, `click`, `click-xy`, `aria-click`, `type`, `press`, `eval`, `upload-image`, `add-context`, `feature-flag`
- **Performance:** `trace`, `profile`, `record`, `perf-metrics`, `wait-settle`
- **Streaming:** `console`, `network-log`, `network-summary`
- **Health & cleanup:** `doctor`, `cleanup`, `watch --restart`
现在,所有 agent 都能用这个 CLI 快速浏览和调试你的应用。你还要开始考虑构建应用时的开发体验:
- 给开发数据库播种
- 处理认证、测试用户、针对测试/预发环境的 API 调用
- 用一致的方式安装并启动开发环境 这些其实都是你自己写代码时早就该考虑的事。所以,把它当成你的 agent 在你的应用上做开发工作的主要工具。要好好维护、好好测试!
其他可以考虑的示例命令:
- **Inspection:** `info`, `snapshot`, `screenshot`, `components`
- **Navigation:** `home`, `new-session`, `select-project`, `select-runtime`, `scroll`
- **Interaction:** `send`, `click`, `click-xy`, `aria-click`, `type`, `press`, `eval`, `upload-image`, `add-context`, `feature-flag`
- **Performance:** `trace`, `profile`, `record`, `perf-metrics`, `wait-settle`
- **Streaming:** `console`, `network-log`, `network-summary`
- **Health & cleanup:** `doctor`, `cleanup`, `watch --restart`
Once you have this basic setup, you should already start to see a big improvement in your agents. They should be able to navigate around and debug your app with ease.
I recommend spending time here making this CLI good and error free before doing anything more advanced. You'll also want to think about (or ask your agent to) designing an agent friendly CLI. There are many resources online you can point your agent to, but the key properties I like are:
- the API is easy to compose - think John Ousterhout's deep modules philosophy
- any command with potentially destructive side effects should have a --dry-run option
- make use of subcommands to gradually disclose functionality rather than all at once
- error messages should be very descriptive and tell the agent what it should do instead
- rich --help text
- outputs returned in machine readable form (eg JSON)
完成这套基础设置后,你应该已经能看到 agent 的表现大幅提升。它们应该能轻松地在应用里导航、调试。
我建议先花时间把这个 CLI 做扎实、做到没有错误,再去做更高级的事情。你还要考虑(或让 agent 考虑)如何设计一个对 agent 友好的 CLI。网上有很多资源可以丢给 agent 参考,我自己最看重的几个特性是:
- API 容易组合——想想 John Ousterhout 的“深模块”哲学
- 任何可能产生破坏性副作用的命令都要有 --dry-run 选项
- 用子命令逐步暴露功能,而不是一次全倒出来
- 错误信息要写得很具体,告诉 agent 接下来该怎么做
- 丰富的 --help 文本
- 输出采用机器可读的形式(例如 JSON)
Go faster with parallelism with Cloud Agents instead of worktrees
When you've had some success running your verification skill to land a few PRs, you might start to wonder if you can parallelize more. For example, if an agent can now take your prompt and mostly drive it to a mergeable state, doesn't that free you up to run more agents?
Your first instinct will be to add worktree support, meaning that your agents can use git to create a tracked copy of the repo where they can make changes in isolation to the main checkout. In theory, this lets you run multiple agents at once without their changes clobbering over each other.
I would recommend against doing this. For one, it uses a lot of storage space and resources on your machine. You may be able to get away with running up to 10 agents in parallel with worktrees depending on the size of your repo and how powerful your machine is. But there's a far better way!
用 Cloud Agents 并行,而不是 worktree
当你用验证技能成功合入几个 PR 后,可能会开始琢磨:能不能更并行一点?比如,既然 agent 现在能接住你的 prompt,并且大多能把事情推进到可合并状态,那是不是意味着你可以同时跑更多 agent?
你的第一反应会是加 worktree 支持:让 agent 用 git 创建一份受版本控制的仓库副本,在副本里改东西,与主 checkout 隔离。理论上,这样能同时跑多个 agent,而它们的改动不会互相覆盖。
我不建议这么做。首先,它很占机器上的存储和资源。根据仓库大小和机器性能,你也许能用 worktree 同时跑最多 10 个 agent。但还有好得多的办法!
Cursor's cloud agents are agents that run on the cloud, on Cursor's infrastructure. These agents have access to a real computer, meaning that they can install dependencies, run your app, take videos and screenshots, and interact with your app like a real user can. If you've invested enough in the previous step to make your dev experience good, it shouldn't be a huge lift to be able to set up cloud agents. When you first set up your cloud environment, we send an agent to help you get it set up and running correctly. After the first build, we take a snapshot which means that subsequent cloud agent runs always start up quickly.
I highly recommend taking the time to set cloud agents up, as it unlocks a massive increase in productivity in parallelism. In a later post I'll show you how I run hundreds of subagents in parallel in the cloud! But for now, set up your environment and get it to a state where you can start to feel confident about running all your agents in the cloud.
Cursor 的 cloud agents 运行在云端,跑在 Cursor 的基础设施上。这些 agent 有一台真正的计算机,意味着它们能安装依赖、运行你的应用、录屏截图,还能像真实用户一样与应用交互。如果你在上一环节投入足够多、把开发体验做好了,那么搭建 cloud agents 不应该是什么大工程。第一次配置云环境时,我们会派一个 agent 帮你把它正确跑起来。首次构建后我们会打一个快照,这样后续每次 cloud agent 启动都很快。
我强烈建议花时间把 cloud agents 配好,因为它能在并行上带来巨大的生产力提升。后面的文章里,我会展示如何在云端并行运行数百个子 agent!但现在,先把环境配好,配到你有信心把所有 agent 都放到云端跑的程度。
Keep agents smart with Feature Maps
As your app grows more complex, agents need more guidance to be able to find features and interact with them. To do this, I've come up with something I call the Feature Map. As the name suggests, it's an easily searchable map of all the features available in your app, what it does, and how to get to it from a user's perspective.
Here's an example Feature Map that I've prepared for a fictional app called Atlas. It's just a couple of markdown file that are mentioned in the verification's SKILL.md.
You can put this file anywhere, but in /create-verification-skill we automatically create a references/features directory alongside a README.md. The readme is the map itself: a high level overview of all the major features available, with links to specific details. An example feature looks something like this:
# Preferences

Full-screen preferences overlay and its tab set.

## Sub-features

- settings-overlay: full-screen overlay opened from the gear or Cmd/Ctrl+,
- settings-nav: left nav of tabs (General, Appearance, Models, Plan & Usage, ...).
- settings-search: in-overlay search (Cmd/Ctrl+K while settings is open).
- theme-picker: quick theme control on Appearance.

## How to get to it (user POV)

Click the gear next to the account avatar, or press Cmd/Ctrl+,. Pick a tab from the left nav. Type in the preferences search box to jump. Escape or the close control dismisses.

## Driving it with control-atlas

bash
node .cursor/skills/verify-atlas/control-atlas.mjs press "Meta+Comma"
node .cursor/skills/verify-atlas/control-atlas.mjs snapshot
node .cursor/skills/verify-atlas/control-atlas.mjs press "Escape"

- Overlay root: look for a dialog/region named Preferences in the a11y tree.
- Tabs: click by visible name. Plan & Usage may be absent for some account states.
- While settings is open, Cmd/Ctrl+K is preferences search, not the global palette (see `multi-surface-journeys.md`).

## Gotchas

- Closing settings mid-suite can leave focus nowhere useful. `new-session` or `home` recovers.
- Some tabs are entitlement-gated. Skip with an explicit account reason.
用 Feature Map 让 agent 保持聪明
应用越复杂,agent 就越需要指引,才能找到功能并与之交互。为此,我想出了一个叫 Feature Map 的东西。顾名思义,它是一张可搜索的地图,列出应用里所有功能、每个功能做什么,以及从用户视角如何到达。
下面是我为一个叫 Atlas 的虚构应用准备的 Feature Map 示例。它其实就是几个 markdown 文件,在验证技能的 SKILL.md 里被引用。
这些文件放哪儿都行,不过在 /create-verification-skill 里,我们会自动创建一个 references/features 目录,并在旁边放一个 README.md。这个 README 就是地图本身:高层概览所有主要功能,并链接到具体细节。一个功能条目大概长这样:
# Preferences

Full-screen preferences overlay and its tab set.

## Sub-features

- settings-overlay: full-screen overlay opened from the gear or Cmd/Ctrl+,
- settings-nav: left nav of tabs (General, Appearance, Models, Plan & Usage, ...).
- settings-search: in-overlay search (Cmd/Ctrl+K while settings is open).
- theme-picker: quick theme control on Appearance.

## How to get to it (user POV)

Click the gear next to the account avatar, or press Cmd/Ctrl+,. Pick a tab from the left nav. Type in the preferences search box to jump. Escape or the close control dismisses.

## Driving it with control-atlas

bash
node .cursor/skills/verify-atlas/control-atlas.mjs press "Meta+Comma"
node .cursor/skills/verify-atlas/control-atlas.mjs snapshot
node .cursor/skills/verify-atlas/control-atlas.mjs press "Escape"

- Overlay root: look for a dialog/region named Preferences in the a11y tree.
- Tabs: click by visible name. Plan & Usage may be absent for some account states.
- While settings is open, Cmd/Ctrl+K is preferences search, not the global palette (see `multi-surface-journeys.md`).

## Gotchas

- Closing settings mid-suite can leave focus nowhere useful. `new-session` or `home` recovers.
- Some tabs are entitlement-gated. Skip with an explicit account reason.
Don't worry about writing these yourself! When you run /create-verification-skill, your agent will automatically go through your app and catalog everything and create these references for you.
The Feature Map, when combined with the CLI, is one of the main reasons why pstack's verification skills are so good. Agents now have context about every single feature and how to get to it, saving precious tokens in its context window and teaching it exactly what it's for and how to get there.
You can think of the Feature Map as a form of "materialized memory". If you've been using agents for a while you're probably familiar with the concept of memory - typically these might be stored as simple markdown files (eg an Obsidian vault), or even something more complex like a vector database. Personally, I think your codebase is the ultimate form of memory. Code is a projection of the decision making you and your team have made and represents the source of truth for what's happened and how things actually work. A Feature Map is just a more compact form of that, designed to save tokens. And because it's just markdown inside of a skill, everyone contributing to your codebase benefits from this shared memory.
别担心要自己写这些!运行 /create-verification-skill 时,你的 agent 会自动遍历应用、把一切编目,并替你生成这些参考文件。
Feature Map 与 CLI 结合,是 pstack 的验证技能如此好用的主要原因之一。Agent 现在掌握了每个功能的上下文以及如何到达它,既节省了上下文窗口里宝贵的 token,也让它清楚每个功能是干什么的、该怎么走。
你可以把 Feature Map 看作一种“物化记忆”。如果你用 agent 有一阵子了,应该熟悉“记忆”这个概念——通常它会存成简单的 markdown 文件(比如一个 Obsidian 库),或者更复杂的东西,比如向量数据库。我个人认为,代码库才是记忆的终极形态。代码是你和团队所做决策的投影,是“发生了什么、事情实际如何运作”的事实来源。Feature Map 只是它更紧凑的一种形式,目的是省 token。又因为它只是技能里的 markdown,所有为代码库做贡献的人都能从这份共享记忆里受益。
This means that maintaining the verification skill is really important. I recommend running /maintain-verification-skill at least once a day to ensure that your agents always have the latest details on controlling your app. You may also find, as you use your verification skill more, that agents will automatically update them as they work on your app. /maintain-verification-skill catches whatever is missed.
这意味着维护验证技能非常重要。我建议每天至少运行一次 /maintain-verification-skill,确保 agent 始终掌握控制应用的最新细节。你也会发现,随着验证技能用得越来越多,agent 在开发应用时会自动更新它。/maintain-verification-skill 负责补上漏掉的部分。
How to use your verification skill
For reference, here's an example verification skill created for a fictional app: https://github.com/poteto/verification-skill-example. As a reminder, run /create-verification-skill to make one, which includes a basic CLI and Feature Map.
Here's how I typically use it with pstack.
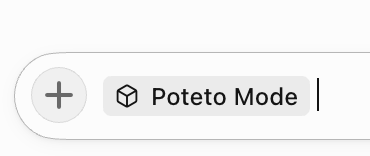
First, of course, is to start your prompt with /poteto-mode. If you're using pstack through Cursor, you can also hit Opt + Enter instead of just Enter when you autocomplete /poteto-mode - this adds the skill as a Custom Mode, which pins the skill so your agent gets a reminder to use the skill on every new turn.
如何使用你的验证技能
供参考,这里有一个为虚构应用创建的验证技能示例:https://github.com/poteto/verification-skill-example。再提醒一次,运行 /create-verification-skill 就能生成一个,里面包含基础 CLI 和 Feature Map。
下面是我通常如何把它和 pstack 一起用。
首先,当然是用 /poteto-mode 开头。如果你通过 Cursor 使用 pstack,在自动补全 /poteto-mode 时,可以按 Opt + Enter,而不是只按 Enter——这会把该技能添加为 Custom Mode,相当于把技能钉住,让 agent 在每个新回合都收到使用该技能的提醒。
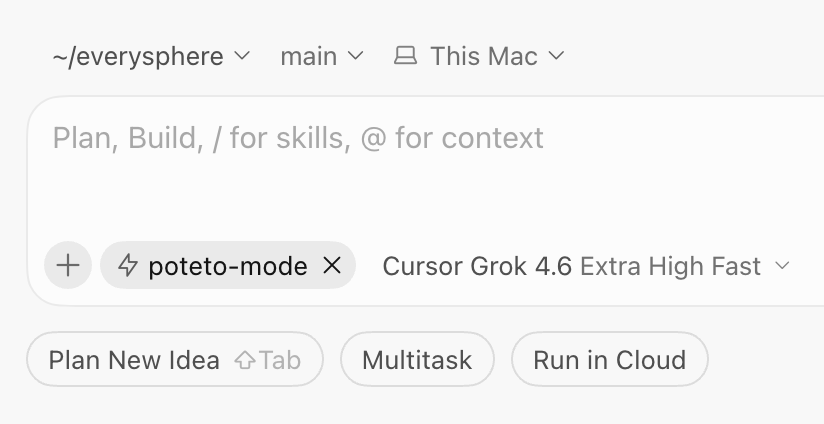
In Grok @Bot, install the plugin, then type /poteto-mode.
在 Grok @Bot 里安装插件,然后输入 /poteto-mode。
Example: Building new features
For building new features, I typically use the verification skill alongside /poteto-mode to get the agent to verify its work. For example, I might prompt something like:
/poteto-mode build <description of feature, any useful context>. use /control-app to verify your changes and show me a video and screenshots as proof
With /control-app being the result of /create-verification-skill. In Grok @Bot, I would prompt something like:
spawn a cloud agent to use /poteto-mode to build <description of feature, any useful context>. use /control-app to verify your changes and show me a video and screenshots as proof
The minor difference here is that in Grok @Bot you tell your bot to spawn a cloud agent instead of doing the work itself. The main reason I prefer to do this is because it frees up your bot to do other things and keeps its context window clean. In that sense, I think of my bots more as coordinators who manage and supervise cloud agents. Cloud agents also mean that you can take advantage of the full array of models available in Cursor which have their own separate machine, so your bot's computer stays free for other things.
示例:构建新功能
构建新功能时,我通常会把验证技能和 /poteto-mode 一起用,让 agent 验证自己的工作。比如,我可能会这样写 prompt:
/poteto-mode build <功能描述、任何有用的上下文>。用 /control-app 验证你的改动,并给我看视频和截图作为证据
其中 /control-app 是 /create-verification-skill 生成的。在 Grok @Bot 里,我会这样写:
spawn a cloud agent to use /poteto-mode to build <功能描述、任何有用的上下文>。用 /control-app 验证你的改动,并给我看视频和截图作为证据
这里的小差别是:在 Grok @Bot 里,你让 bot 派一个 cloud agent 去做,而不是自己动手。我更喜欢这样,主要是因为它把 bot 解放出来做别的事,也保持它的上下文窗口干净。从这个意义上说,我把自己的 bot 看作协调者,负责管理和监督 cloud agents。Cloud agents 还意味着你可以利用 Cursor 里全套可用模型,它们有各自独立的机器,所以你 bot 的电脑能空出来干别的。
Example: Perf work
spawn a cloud agent to use /poteto-mode to improve the initial loading time of our app. first use /control-app to take a trace of the status quo, and identify opportunities for improvement. then do a targeted fix and use /control-app + a /swarm to confirm the win
/swarm is one of the best skills to combine with your verification skill. It fans out any number of cloud agents to run your verification skill, so you can do things like confirm a perf win with a big enough sample size, or fuzz your app to ensure you didn't break or regress anything.
示例:性能工作
spawn a cloud agent to use /poteto-mode to improve the initial loading time of our app. first use /control-app to take a trace of the status quo, and identify opportunities for improvement. then do a targeted fix and use /control-app + a /swarm to confirm the win
/swarm 是和验证技能搭配最好的技能之一。它能把任意数量的 cloud agents 分发出去运行你的验证技能,于是你可以做这些事:用足够大的样本量确认性能收益,或者对应用做 fuzz,确保没有弄坏或引入回归。
Example: Automatically reproduce user reports
When you're happy with your verification skill, you can put them inside of Grok @Bot routines, or Cursor Automations. Routines and automations let you run things on schedule, or trigger whenever an event happens.
For example, if you pipe in user feedback into Slack, and/or have your own internal feedback channel, you can have your bots listen to every report and automatically try to reproduce them with a cloud agent. If your verification skill and Feature Map is good enough, you may even then decide to auto-fix issues as well.
There's a reason I said earlier that verification is the one of the most important skills in your toolbox. It gives you a foundation to build new skills and routines on top of. And most importantly, everyone in your team benefits.
Invest in your verification skill
Once you've created your verification skill, keep it sharp with /maintain-verification-skill. Keep improving the CLI and invest in the skill like you would critical infra. You may even want to put an oncall rotation on it - that's how important it is to unlock 100-1000x productivity for your team.
This skill is the foundation for many other skills that we'll cover in the pstack guide, and composes beautifully with all of them.
- pstack: https://x.ai/bot/plugin/9717366 (github link)
- Dr Eggbot: https://x.ai/bot/93gOz3op1UQdBdbekQFLK
Thanks for reading and stay tuned for Part 2!
示例:自动复现用户反馈
当你的验证技能足够好用后,可以把它放进 Grok @Bot 的 routines 或 Cursor Automations 里。Routine 和 automation 能让你按计划运行任务,或者在某个事件发生时触发。
比如,如果你把用户反馈接进 Slack,或者有自己的内部反馈频道,就可以让 bot 监听每一条报告,并自动用 cloud agent 尝试复现。如果你的验证技能和 Feature Map 足够好,你甚至可以进一步决定自动修复问题。
我前面说验证是你工具箱里最重要的技能之一,是有原因的。它给你一个地基,让你能在上面搭建新的技能和例行任务。最重要的是,团队里的每个人都能受益。
投资你的验证技能
验证技能创建好之后,用 /maintain-verification-skill 让它保持锋利。持续改进 CLI,像对待关键基础设施一样投资这个技能。你甚至可能想给它排一个 oncall 轮值——它对解锁团队 100 到 1000 倍生产力就是这么重要。
这个技能是 pstack 指南里许多其他技能的基础,而且能和它们漂亮地组合。
- pstack:https://x.ai/bot/plugin/9717366(github 链接)
- Dr Eggbot:https://x.ai/bot/93gOz3op1UQdBdbekQFLK
感谢阅读,敬请期待第二部分!